Image Map

Monday, August 22

3 Reasons Graphic Organizers for Writing are the Secret Sauce to Writing Block Bliss

graphic-organizers-for-writing


What is the one sound that you do not want to hear during your writers’ workshop? The sound of nothing. During a writers’ workshop, we want to hear our students' pencils dashing back and forth to fill their pages with their ideas. At writers’ workshop time we want to hear students flipping another page to continue writing and sharing their thoughts on paper. What we teachers do not want to hear during a writers’ workshop block, is the sound of nothing. If no pencils are moving and no pages are flipping, then no writing is happening. So why does this happen so often during our writers’ workshop blocks? There are many reasons that students may not be writing at writing time. From reluctant writers to good old fashion writer's block, there are many reasons our students can struggle to put pencil to paper during writers’ workshops. However, these reasons can all be resolved with one teaching strategy that saved my writers’ workshop many years ago, using graphic organizers for writing. The year I started using graphic organizers for writing was the year that everything changed in my writers’ workshop. Room 204 went from a silent writers’ workshop to one filled with the sounds of scribbling pencils and pages turning to add more ideas. Want to learn how I implemented graphic organizers for writing with my students? Read more to learn my top three reasons why graphic organizers for writing are the secret sauce to writing block bliss!


graphic-organizers-for-writing


The thinking in my school community during my first few years of teaching was that graphic organizers for writing were used only as a differentiation tool for below-benchmark students. This is a fine idea, however, I am in the camp of providing differentiation tools and support to all the learners in my classroom. So, I began using graphic organizers for writing in my writers’ workshop mini-lessons and independent practice times. The difference was amazing! Students at all benchmark levels were producing higher-quality writing pieces and moving through the writing process with more ease! Let’s explore why providing all students with graphic organizers for writing was and continues to be such a game changer. Want to learn more about setting up your best writers workshop ever? CLICK HERE to read my blog post now!


Tip #1 in my 3 Reasons Graphic Organizers for Writing are the Secret Sauce to Writing Block Bliss: Organizational Skills


graphic-organizers-for-writing


Many elementary students struggle with organizational skills. We see this in the crumpled papers spilling out of the backpacks and the missing assignment hiding in the deep trenches of their desks. So it’s easy to imagine that their organizational struggles would carry over into their academic work as well. Crafting and producing a well-organized piece of writing is a challenging skill. Graphic organizers for writing help students organize their thinking. Learners at all levels benefit from the support that graphic organizers for writing provide because it helps to clarify their ideas and where those ideas belong in their story. Once students have clarity in the organization of their writing piece, they feel successful and want to elaborate and expand their writing. This one simple change of teaching with and providing graphic organizers for writing to all students helps them stay organized and produce clear higher quality work. Looking for more tips on how to help your students have organizational success in writing this year? CLICK HERE to read my blog post about the best way to set up your writer's notebooks now. 


Tip #2 in my 3 Reasons Graphic Organizers for Writing are the Secret Sauce to Writing Block Bliss: Helping Reluctant Writers


writers'-workshop


One of the main reasons that students become reluctant writers is because the task of writing is completely overwhelming. Staring at a blank piece of paper is intimidating to many learners. Graphic organizers for writing take the intimidation factor down and the engagement factor up. Our students are children, after all, they should be excited to share their thoughts and ideas, and having visually appealing writing paper (graphic organizers for writing) is just the ticket! When students see the task of writing a conclusion broken down into small boxes or doodles with explanations the giant task is suddenly more manageable. The overwhelming expectation is suddenly doable and students will rise to the occasion now that they have the proper tools. For this reason, graphic organizers for writing will always be my go-to writing tool to help reluctant writers.


Tip #3 in my 3 Reasons Graphic Organizers for Writing are the Secret Sauce to Writing Block Bliss: Dive Deep and Improve Those Skills!


graphic-organizers-for-writing


A common misconception is that graphic organizers for writing should only be used for reluctant writers and below-benchmark students. Graphic organizers for writing should be used for all levels of learners! Graphic organizers for writing provide amazing opportunities for students to dive deep and improve their skills. For example, you may have students who are capable of writing a story introduction, however, those skills can always be improved. Why not take our students from good writers to great writers? Take that skill of writing an introduction and break it down into bite-sized pieces. Use your graphic organizers for writing to hone in on each component of a strong introduction and make those components the best they can be. When we use graphic organizers for writing with all of our students, we have the tools to break down the writing process into smaller chunks and writing skills. This allows us to deep dive into specific writing skills and vastly improve the quality of our students' writing. Looking to explore the graphic organizers for writing that I use in my writers’ workshop? Click HERE to explore them now!


Are you ready to get rocking, rolling, and writing with your own writers’ workshop? Then be sure to download my writing workshop checklist and launch your best writers’ workshop now! CLICK HERE to download.


writing-workshop


Monday, August 1

How to Improve Reading Comprehension with Readers Response Journals Right Now

how-to-improve-reading-comprehension


How to Improve Reading Comprehension with Reader's Response Journals Right Now: What is Reading Comprehension?


Before we can answer the question of how to improve reading comprehension: let’s first discuss what reading comprehension is. Reading comprehension is the ability of the reader to understand and interpret the text that they are reading. In order to comprehend a text, our students must be having intentional interactions with the text. Simply put, in order for our students to understand (comprehend) what they are reading we must make sure they are reading a level-appropriate text and taking their time to read with purpose and meaning.


how-to-improve-reading-comprehension


How to Improve Reading Comprehension with Reader's Response Journals Right Now: Use Reader's Response Journals


Now that we have established that intentional interactions with stories are crucial for answering our question, of how to improve reading comprehension, we have a new question to answer. How can we teach our students to read with purpose and intention? The answer is actually simpler than you might think, reader's response journals. Reader's response journals and notebooks are a place where students will reflect and respond to what they are reading in their text. This can happen in the form of prompted questions about character traits or graphic organizers about the story plot. There are many ways to set up and create reader's response notebooks (you can read my top tips for creating reader's response entries by CLICKING HERE NOW). Whether you use prompts or graphic organizers, the result is the same, reader's response journals cause our students to pause and think about their reading. When we ask our learners to stop and reflect on what they have been reading, it gives their minds a moment to digest the text and aids their understanding and reading comprehension. 


how-to-improve-reading-comprehension


Another reason that I love using reader's response journals to boost reading comprehension is to deepen character understanding. When we ask students to write and respond to questions about the characters in their texts, we promote deep thinking and pondering about our characters. Why do they do what they do? Why do they dress the way that they dress or behave the way that they do? When students have to write a reading response entry on a character in their story, they have to get to know them better to clearly develop, write, and share their thoughts about the character. This leads to increased student reading comprehension!


The final answer to our question, how to improve reading comprehension with reading response journals is increased memory. One reason that many students struggle with reading comprehension is that they are unable to remember events and important tidbits that previously happened in their text. If you don’t remember where you were, how can you understand where you are now? Let's look at an example. My text briefly discussed the childhood importance of my character's locket necklace and the events that unfolded around her receiving that necklace. If I did not pause to mentally log the importance of this as I was reading, how can I develop a deep understanding of my character's changes and transformations throughout the storyline? 


readers-response


We can all agree that pausing and reading with purpose is crucial for increasing student reading comprehension, but how can we be sure our students are slowing down to remember important events from their text? With reader's response journals. The key here is having our students write about their reading. The act of physically writing something down increases the sensory information that is sent to the brain. This increased sensory information gives our hippocampus an increased likelihood of storing the information for a longer period of time. Technical talk aside friends, if we want to increase our students' reading comprehension skills, we have got to get them to write about their reading in a reading response notebook. 


readers-response


Are you ready to start using reader’s response journals with your students? CLICK HERE to explore my favorite reader’s response journals now!


readers-response


Monday, July 25

3 Tips to Make Spelling and Grammar Practice Fun in Your Classroom

spelling-and-grammar


Real talk time, I hate spelling and grammar. As a student, I struggled with spelling and grammar and when I began teaching, I still carried a strong disdain for those subjects that had me on the struggle bus every day after snack time. Because I hated and I do mean I truly hated spelling and grammar as a student, I made it one of my missions to make spelling and grammar lessons and practice exciting for my students. Through many failed lessons, headache-causing center ideas, and years under my belt, I can finally share that spelling and grammar time with my students is a fun time! Want to learn how you can make spelling and grammar engaging for your students this year? Read more to explore my top three tips to make spelling and grammar practice fun in your classroom now!


Tip #1 in My 3 Tips to Make Spelling and Grammar Practice Fun in Your Classroom: Get Hands On!

spelling-and-grammar


One of the main reasons that I hated spelling and grammar when I was a student was because it was so stinkin’ boring! Every day we would practice memorizing the weekly word list by writing them on lined paper folded “hotdog style,” or write that same list on notecards and quiz ourselves. Can we say snoozefest! I struggled with spelling and grammar academically, and let me tell you, boring memorization activities were not the strategy to help me enjoy those subjects more.  


spelling-and-grammar


If you want to boost student engagement around spelling and grammar, you have to bring the fun factor! What is more fun for kids than when they get to use their hands? Get hands-on with spelling and grammar in center activities, independent work, or at the small group table. Some easy hand-on spelling and grammar activities include: using magnetic letters and a cookie sheet, using Pop Its fidgets with the alphabet written on them, and using erasable sleeves paired with spelling and grammar worksheets. The list goes on and on. If you want to explore more ideas for making your spelling and grammar activities hands-on then CLICK HERE to read my spelling blog post.


Tip #2 in My 3 Tips to Make Spelling and Grammar Practice Fun in Your Classroom: Try Going Digital

spelling-and-grammar


Students love using technology in the classroom. Teaching to the technological intelligence and increased student engagement are two reasons that I love using technology in class. The question now is, how can I incorporate spelling and grammar practice with technology? Easy! My top two favorite ways to increase spelling and grammar tech fun in the classroom are to use YouTube and digital interactive notebooks. Try utilizing Youtube as a hook for your whole class spelling and grammar lesson, or as a brief review before students begin a center. As for digital interactive notebooks, these can be used during independent task time, spelling and grammar center time, or even as an engaging homework assignment. My students love using digital interactive notebooks to click, drag, move and explore spelling and grammar concepts. Want to explore the digital interactive notebooks that I use for fun spelling and grammar practice? CLICK HERE now.


spelling-and-grammar


Tip #3 in My 3 Tips to Make Spelling and Grammar Practice Fun in Your Classroom: Tier and Differentiate 


Differentiation in reading is key. You would not ask a child reading at an F&P level M to read and comprehend a level R text. The same goes for spelling and grammar practice. In order to increase enjoyment and engagement, we need to keep students inside the zone of proximal development. When we meet students where they are at, we can help them make small continuous gains towards their goals without feeling overwhelmed and defeated. Try taking an inventory of your student's spelling and grammar knowledge at the beginning of the year. You can assess high-frequency words or specific spelling patterns that are appropriate for your grade level. Then use this data to split your students into three groups, below benchmark, benchmark, and above benchmark. You will use the data you collected to differentiate and tier spelling lists for your three groups and give them words and patterns that meet them at their current level and push their thinking. When I create spelling and grammar tiered groupings I often give them animal names (for example lion, dolphin, moose) so that my students do not realize that their word lists are differentiated by groupings. Tiering my student's spelling and grammar practice helps students feel successful and have more fun with the activities. When our students feel successful with spelling and grammar, they will not only enjoy the lessons but push their thinking to try more. I easily differentiate across my three spelling and grammar groups by using editable spelling activities. These editable spelling activities allow me to type in a word list and then that word list will automatically fill into each activity word bank. At the beginning of each week, I simply type in my three different word lists and generate a week-long activity and practice packet for my three differentiated groups. Easy differentiation and fun spelling activities, make this tip one you want to try! If you want to explore the editable spelling activities that I use, then CLICK THIS LINK now. 


spelling-and-grammar


Do you incorporate spelling lessons into your writers' workshop? Are you ready to get rocking, rolling, and writing with your own writers’ workshop? Then be sure to download my writing workshop checklist and launch your best writers’ workshop now! CLICK HERE to download.


writing-workshop


Monday, July 18

3 Steps for Boosting Writing Skills With Writing Prompts for Fiction Right Now


writing-prompts-for-fiction

Have you ever underestimated something? For example, I constantly underestimate the amount of pasta it will take to feed my family. It never fails that I will feel the need to cook the entire box of pasta instead of a fistful amount. Many teachers underestimate the power that writing prompts will have on their students. Writing prompts, specifically writing prompts for fiction have an incredible ability to skyrocket student writing skills. Honestly, the year that I started using writing prompts for fiction in my classroom is the year that my writing instruction game changed. Do you want to learn how to easily use writing prompts for fiction to ramp up your students' writing abilities? Read more to learn my three steps for boosting student writing skills with writing prompts for fiction right now!


3 Steps for Boosting Writing Skills With Writing Prompts for Fiction Right Now: Engage Your Writers

writers-workshop


One of the main reasons that writing prompts for fiction are massively impactful on your student's writing abilities is that they boost engagement. A child who is excited about a task will always put in more effort than you expect. Writing is difficult for so many students. To get them to buy into the challenging task of writing, I ramp up their excitement levels. Children love to imagine and be creative. That is why even your reluctant writers will produce more work when they have a chance to be creative. This is why I love using writing prompts for fiction. Writing prompts for fiction allow my students to get their creative juices flowing and write about silly, magical, mysterious, and thought-provoking topics. It is easy for me to boost student engagement in the writing process when I use writing prompts for fiction. Fiction writing prompts allow my students to enjoy the experience of writing and have fun. When my students use writing prompts for fiction, they are engaged and excited to write and that engagement will boost their writing skills every single day. If you want to explore my favorite writing prompts to use all year along then CLICK THIS LINK.


3 Steps for Boosting Writing Skills With Writing Prompts for Fiction Right Now: Targeted Writing Skills

writing-prompts-for-fiction


The next step to boosting your students' writing skills with writing prompts for fiction is to align them with targeted skills practice. Let me break it down for you. You have already won your students over by ramping up their buy-in and engagement level. Now you get to increase your impact and capture those lightbulb moments! Use writing prompts for fiction when you want students to practice targeted writing skills. For example, if you recently taught a mini-lesson on dialogue, have your students use a “critter conversation” writing prompts to practice during independent work time. If your students need practice using transition words try using a cookie bandit mystery writing prompt as a morning meeting activity. There are countless ways to incorporate writing prompts for fiction into your daily lessons and increase targeted writing skill time. Are you interested in learning more about using daily writing prompts to easily boost student writing skills? Click HERE to read my post for boosting writing skills in fourth grade now.


3 Steps for Boosting Writing Skills With Writing Prompts for Fiction Right Now: Monthly Goals

writing-prompts-for-fiction


The third way I use writing prompts for fiction is to reach monthly writing goals with my students. Each month students will get new seasonal-themed fiction writing prompts (example: turkey in disguise, a letter to my teacher, spring poetry, and more). Additionally, with new month-themed writing prompts, students will also get a new month goal setting worksheet. This allows me to conference with my students and differentiate goals to help each one of them improve their writing skills. We keep these goal-setting worksheets at the beginning of their writing prompt journals this way every time they are ready to use a writing prompt for fiction in a task, they have to flip past their goals worksheet. This is important because seeing their goals daily will keep them striving to practice and reach those goals. If you want to explore the monthly writing prompts and goal setting worksheets that I use, CLICK HERE


Are you ready to get rocking, rolling, and writing with your own writers’ workshop? Then be sure to download my writing workshop checklist and launch your best writers’ workshop now! CLICK HERE to download.


writing-workshop


Monday, July 11

3 Tips to Launching Your Best Writers' Workshop

writers’ workshop


What is the best way to help your students grow as writers? For me, the answer to that question is simple, a writers' workshop. Writers’ workshop is my favorite instructional system to help my students move mountains in their writing skills and practice. But what even is a writers’ workshop? How do I set up a successful writers’ workshop that will help my students capture the most lightbulb moments possible? Believe it or not, launching a rock star-worthy writing workshop doesn’t have to be that hard. Read more below to explore my top three tips for launching your best writers’ workshop now!


Tip #1 in My 3 Tips to Launching Your Best Writers' Workshop: Have a Plan

writers’ workshop


Let’s start from the beginning, shall we? You may be wondering, what exactly is a writers’ workshop? A Writers' workshop is a way to structure your writing block. The standard writers' workshop will have the following components: mini-lesson, writing time, and a share. Your mini-lesson is a short 5-15 minute teacher lead instruction. During this time you will gather students to your lesson area in the classroom and deliver a brief but impactful mini-lesson for their current writing skills. Next, You will release students from the mini-lesson area to return to their writing spaces and work on their assigned tasks (ex. writing prompts, working in their writing journals, etc.). While the students are working independently, you will be holding writing conferences to check in with students and help them grow in their craft and skills. Be sure to record all of your notes in your conferring binder or notebook. (CLICK HERE to read all about the easiest conferencing notes you’ll ever take). Finally, you will wrap up your writers’ workshop block by calling students back to the gathering area and giving them time to share their writing work from class today with a peer. 


writers’ workshop


Now that we’ve gone over the basic components of a writers’ workshop, let’s talk about making a plan to launch those components into your best writers’ workshop! The very first thing you will need to do is to set up a writing station in your classroom. This will be a space where you house all your current skill anchor charts, a breakdown of the writers’ workshop schedule, and your clearly labeled writers’ workshop student tools (extra paper, erasers, etc). You can read more about setting up your best writing station by CLICKING HERE.

writers’ workshop


The next step you will need to take is to teach the new routine to your students. What does the timeframe look like for each part of this new writing block routine? Where will they physically go during each component (ex. Gathering area, conferencing area, independent writing spot). Finally and most importantly, take time to actively model the expectations for each area. DO NOT SKIP THIS PART! I promise you if you take the time to physically act out the expected and unexpected behaviors in each spot you will thank me twenty times over in the long run.  For example, show the students what it will look, see, and sound like during mini-lesson time each day. Then be sure to show them what it will NOT look, see, and sound like and discuss the differences and their importance. Pro tip: when active modeling, be sure the students are always acting out the correct or desired behavior and you are the only one acting out / modeling the “wrong” behaviors. Students will love seeing you as the adult act poorly and in ways that they know are not correct for the classroom. This visual will help the expectations and desired behaviors for the writers’ workshop sink in for your students. Hold on, you’re almost done! When you break down each section and active model what each time will look, see, and sound like, be sure to write and post them on an anchor chart! This will be immensely helpful to remind students of the new writers’ workshop routine and expectations as you roll out the new routine. Finally, be sure to plan on practicing and repeating the writers’ workshop expectations. This is not a one-and-done thing, with all expectations, they will hold longevity when you practice, practice, practice them. I know that this can be a pain when you just want to hit the ground running! But take it from me, teacher friend, if you do not take the time to thoroughly teach and practice the routines, your writers’ workshop structure will crumble.

writers’ workshop


Tip #2 in My 3 Tips to Launching Your Best Writers' Workshop: Writers Notebooks

writers’ workshop


Now that you have your writers’ workshop routine rolled out, let's talk about instruction. As you guide your students through their targeted skills and writing instruction how will you keep them organized? What tools can you use to help your students capture those coveted lightbulb moments and thrive as writers this year? I always use writers’ notebooks as my tool of choice to keep my kiddos organized and help them thrive. A writer's notebook is a one-stop-shop that contains everything my students will need for each writing unit I will teach them during our writers’ workshop this year. You can set up a writer's notebook in three different ways: a three-ring binder, a composition notebook, or using plastic binding combs. Writing notebooks are KEY to my student's success in my writers’ workshop! Inside each writer's notebook, my students will have a growing student dictionary, suggested words to expand their vocabulary, a commonly misspelled word list, dividers for easy access and organization, and graphic organizers that will lead us through the entire writing process, final copy paper, and more. These tools are crucial to have in the palms of my student's hands every single day. The more I give them access to, the more they will grow! Additionally, my students always know where their writing work is located, inside their writer's notebook. This rockin’ writing tool is easy to transport to teacher conferences as well. Win-win! If you want to explore my favorite writers’ workshop writing tool, then CLICK THIS LINK NOW.

writers’ workshop


Tip #3 in My 3 Tips to Launching Your Best Writers' Workshop: Build a Love of Writing


My final tip for launching your best writers’ workshop ever is to help your students build a love of writing. As teachers, we want to foster a passion for curiosity and a desire for knowledge in our student's hearts. How can a writers’ workshop help you to fan that writing flame? Through your share time. The share component of the writers’ workshop is when students get to shine. Here they will have time carved out to share their hard work each day. This is so important because students will feel a sense of pride when sharing their writing work with others. This pride will help them begin to love writing and believe the truth that they are good writers. I love to use our daily writing prompts for our share time. I choose this because these writing prompts are always “gotta talk about it” topics that get my kiddos talking and sharing. Whether you have kiddos share from their writer's notebook or their daily writing prompts make sure to save time for that powerful share time and watch your students begin to soar.

writers’ workshop


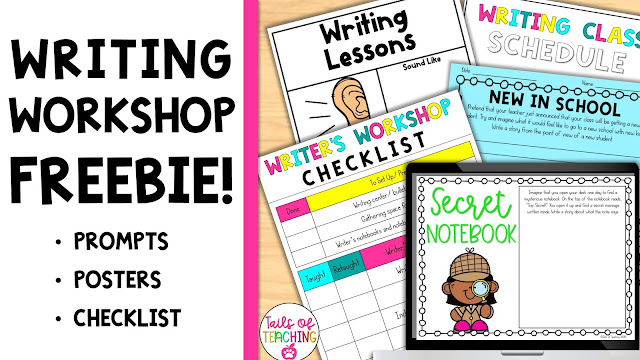
There you have it, my top three tips for launching your best writers’ workshop. Are you ready to get rocking, rolling, and writing with your own writers’ workshop? Then be sure to download my writing workshop checklist and launch your best writers’ workshop now! CLICK HERE to download.

writing-workshop


Wednesday, July 6

The 3 Top Tips for Teaching Strong Reader's Response Entries

reader's-response

Reading is a tricky skill. Responding to reading is even trickier, and crafting a rich reader's response is the top layer on the tricky reading skills cake. Reader's response journaling is an extremely powerful tool in reading instruction. Reader's response entries allow students to show off their skills and thinking through their texts. Reader's response entries also allow teachers to discuss and evaluate our kiddo's level of understanding in reading skills to reteach, push, and ultimately help them make massive gains in reading. Reader's responses are an amazing strategy, but how do we teach our students to craft them? How can we teach students to show off their thinking and write powerful reader’s response entries that make them proud? Read more to explore my top three tips for teaching strong readers response entries now!


Tip #1 in The 3 Top Tips for Teaching Strong Readers Response Entries: Teach How to Respond to Reading

reader's-response


If you want to improve the reader's response entries that your students write, then you need to explicitly teach how to craft a reading response. Start by using your favorite mentor text, pick a reader's response question or skill to respond to, and get to work! Active model a fantastic reader's response journal example for your students. Take your time and don’t skip a single step! Start by discussing what you are thinking before you write so your students can hear how strong readers engage their minds while reading. Then show how to format your reader's response on an anchor chart or whiteboard. Finally, show students how to use text evidence to support their thinking and correctly cite that evidence. 

reader's-response-notebook


Once your active modeling is complete, allow time to discuss the process with your students. Explain the importance of each step and how strong reader's response journaling will make them better readers this year. After that, send students back to their working spaces to copy the reader's response example that you just created. This is crucial! For your students to grow as readers and in their reading responses, they need to have tools at their disposal that will help them get the job done well. You cannot have a one-and-done reader's response lesson and poof! expect to have stellar reader’s response entries like magic. Actively reading and writing about reading is hard work! Students will work at this reader's response skill over time, like strengthening a muscle. To strengthen this muscle, students must-have resources and tools to refer to. Make sure students glue this class-created reader's response exemplar into their reader's response notebooks. This will serve as a mini anchor chart and reference for them as they continue to improve their reader's response skills.


Tip #2 in The 3 Top Tips for Teaching Strong Readers Response Entries: Use Question Starters.

reader's-response


Now that you have actively modeled a strong reader's response for your students, it is time for them to practice. However, we don’t want to toss our kiddos into the deep end of the pool when they have only dipped their toes in and still have floaties on their arms. In order to help students progress in their reader's response journaling, we need to give them baby steps to success. Instead of expecting students to instantly begin reading and responding like active readers, take a step back and give them reader's response prompts and graphic organizers. These prompts and reading graphic organizers will serve as a starting point and allow their heavy lifting and thinking to be done in crafting their strong reader's response. I provide my students with reader's response question starters and graphic organizers for every targeted reading skill that they will write about this year. For example, if they are writing a reader's response about our new targeted reading skill of inference, I provide them with question starters like, “When I read ___ I can infer ____. I know this because ____.” Additionally, they have reading graphic organizers to reach targeted reading skills available to them inside of their reader's response notebooks. Simply providing a starting point for students through graphic organizers or prompts helps them to springboard their ideas onto their papers and highlight their thinking in their reader's response. If you want to explore more about how I teach inference, click THIS LINK to read my blog post now.


Tip #3 in The 3 Top Tips for Teaching Strong Readers Response Entries: Give Them Easy Access to Reading Tools.

reader's-response-notebook


Do you remember earlier on in this blog post when we discussed the importance of your students saving and using the reader's response exemplar? This ease of access to tools can not stop there! If you want your students to demonstrate their depth and understanding of characters or plot then give them the tools to remember your mini-lesson and build off of it. Provide your students with mini anchor charts that they can keep inside of their reader's response notebooks. This is the most powerful tool you can give your students when helping them grow as active readers and craft powerful readers response entries. For example, let’s pretend that my student Sonya is reading the book The Wild Robot and I ask her to do a reading response about the main character Roz. Without the proper tools, I am expecting her to recall character trait lessons and skills, mentally decide what to write a reader's response about, find text evidence, cite, and format it all correctly. That is a lot for an elementary student to do independently. Without the proper support in place, Sonya may feel overwhelmed, defeated, and produce a reader's response that does not accurately display her knowledge of character traits. However, when Sonya is given a reference point and prompts to get her started, light bulb moments burst and flash. She can focus on building on her character trait knowledge instead of just trying to recall the base level lesson and reproduce a reader's response at the introductory level. Deep thinking is what we are aiming for and excitement around reading. Mini anchor charts help our students feel confident in their reader's responses and proud of their work. When our kiddos are proud of what they create, they will always work harder than we expect them to and learn even more.

reader's-response


I hope you enjoyed reading my top three tips for teaching strong readers response skills. If
you are looking for more tips to help your students capture light bulb moments in reading, then CLICK HERE to read my blog post about targeted reading skills now!


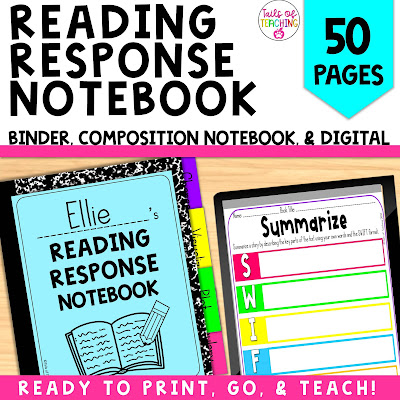
Are you looking for the reader's response notebooks that I use and love so much? CLICK THIS LINK to explore my favorite reader's response notebooks now!


reader's-response